Hippeastrums are the big, fat, trumpet-shaped flowers that most of us (wrongly) still call Amaryllis. If you walk into our store we call them Amaryllis! Don’t worry were all on the same wrong page with beautiful superfluous flowers.

As crocus, daffs and tulips disappear from the shelves of our shop, these huge, beefy bulbs take their place. In flower, they look as though they've wandered off the set of Walt Disney's Fantasia. You can scarcely believe that any flower can be so vast, so stiff, so voluptuously unreal.
Once you get them started, they grow indoors at a phenomenal rate. You can buy them as extra presents for children, but pot them up and get them going before handing them over. From then on, there is enough action to engage children.
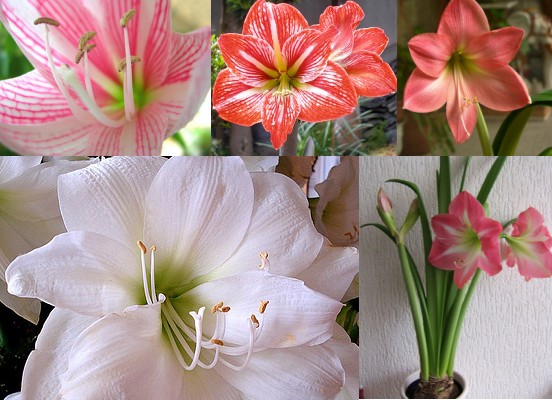
There was a time when hippeastrums, like potatoes, only came in two colors: white and a pleasingly shocking shade of red. The red was usually 'Red Lion' and the white 'Apple Blossom', which was actually a very pale pink. But partly because hippeastrums have recently become such popular cut flowers, there's been a very welcome explosion in the number of varieties available at this time of year. You can see why professional florists like hippeastrums so much. They last a long time in water and you don't need many of them to make a dramatic display.
You can experiment by planting the bulbs themselves in tall, thick glass vases. You need to be careful about watering, as there will no holes at the bottom like you would have in a pot, but the final effect is wonderful, very spare and spacey. Add slender twigs of beech, twisty willow or branches if you want a fuller effect. You can stick the twigs straight in the compost that is already there.

Big is not always best, but with hippeastrums, it pays to get top-size bulbs. Kits, containing pot (usually hideous), compost and bulb are not such good value as buying bulbs on their own. Check that each bulb is firm, that its nose is not damaged and that it has plenty of fleshy roots. Soak the roots for 12-24 hours, by balancing the bulb on top of a jar of tepid tap water. Do not get the base itself wet, or it may rot.
Choose 6” pots for smallish bulbs, 7” pots for medium-sized bulbs and 8” pots for big the biggest ones . You do not need to leave much space between the edge of the bulb and the edge of the pot, but the deeper the pot the better. Plastic is easier to manage than terracotta (though does not look as good). The pots must, of course have drainage holes.
The compost you use must be nutritious and free-draining. I have had decent results simply by mixing multipurpose compost with gravel or sand (two parts compost to one part gravel/sand). Add a slow-release fertiliser (such as Osmacote granules) to the mix.
Put a layer of your compost in the bottom of a pot. Hold the bulb in one hand with its roots hanging down and firm more compost round the roots. The nose of the bulb should poke up above the rim of the pot and its shoulders should be above the surface of the compost. Water with tepid water and put the pot in a warm, light, well-ventilated place, free from draftes . A temperature around 70 degrees is ideal.

Let the compost dry out on top before watering. Always water from the top, never from the bottom. Do not wet the nose of the bulb or allow the pot to stand in water for a long period. When the first shoot appears, start feeding by adding a liquid fertiliser when you water. Give the pot a quarter turn each day to keep the stems growing straight. You may need to stake them as they grow. When the buds start to open, move the pot to a cooler place so the flowers last as long as possible. Suppliers suggest that hippeastrums will come into flower six to eight weeks after planting. They have never been that fast for me. ten weeks plus is more realistic maybe it’s a New England thing
As crocus, daffs and tulips disappear from the shelves of our shop, these huge, beefy bulbs take their place. In flower, they look as though they've wandered off the set of Walt Disney's Fantasia. You can scarcely believe that any flower can be so vast, so stiff, so voluptuously unreal.
Once you get them started, they grow indoors at a phenomenal rate. You can buy them as extra presents for children, but pot them up and get them going before handing them over. From then on, there is enough action to engage children.
There was a time when hippeastrums, like potatoes, only came in two colors: white and a pleasingly shocking shade of red. The red was usually 'Red Lion' and the white 'Apple Blossom', which was actually a very pale pink. But partly because hippeastrums have recently become such popular cut flowers, there's been a very welcome explosion in the number of varieties available at this time of year. You can see why professional florists like hippeastrums so much. They last a long time in water and you don't need many of them to make a dramatic display.
You can experiment by planting the bulbs themselves in tall, thick glass vases. You need to be careful about watering, as there will no holes at the bottom like you would have in a pot, but the final effect is wonderful, very spare and spacey. Add slender twigs of beech, twisty willow or branches if you want a fuller effect. You can stick the twigs straight in the compost that is already there.

Big is not always best, but with hippeastrums, it pays to get top-size bulbs. Kits, containing pot (usually hideous), compost and bulb are not such good value as buying bulbs on their own. Check that each bulb is firm, that its nose is not damaged and that it has plenty of fleshy roots. Soak the roots for 12-24 hours, by balancing the bulb on top of a jar of tepid tap water. Do not get the base itself wet, or it may rot.
Choose 6” pots for smallish bulbs, 7” pots for medium-sized bulbs and 8” pots for big the biggest ones . You do not need to leave much space between the edge of the bulb and the edge of the pot, but the deeper the pot the better. Plastic is easier to manage than terracotta (though does not look as good). The pots must, of course have drainage holes.
The compost you use must be nutritious and free-draining. I have had decent results simply by mixing multipurpose compost with gravel or sand (two parts compost to one part gravel/sand). Add a slow-release fertiliser (such as Osmacote granules) to the mix.
Put a layer of your compost in the bottom of a pot. Hold the bulb in one hand with its roots hanging down and firm more compost round the roots. The nose of the bulb should poke up above the rim of the pot and its shoulders should be above the surface of the compost. Water with tepid water and put the pot in a warm, light, well-ventilated place, free from draftes . A temperature around 70 degrees is ideal.

Let the compost dry out on top before watering. Always water from the top, never from the bottom. Do not wet the nose of the bulb or allow the pot to stand in water for a long period. When the first shoot appears, start feeding by adding a liquid fertiliser when you water. Give the pot a quarter turn each day to keep the stems growing straight. You may need to stake them as they grow. When the buds start to open, move the pot to a cooler place so the flowers last as long as possible. Suppliers suggest that hippeastrums will come into flower six to eight weeks after planting. They have never been that fast for me. ten weeks plus is more realistic maybe it’s a New England thing
